
Today we are going to show you how to make a tin can stove, this type of stove has been around about as long as tin cans have been created, but it reached its peak of popularity during the great depression. Now its popularity is mostly with frugal backpackers and girl scouts, as a matter of fact, the majority of comments I have gotten were from former scouts telling me how hot this stove can get…
I first learned about this stove at a vacation bible school camp at the Tennessee Baptist Children’s home in the 80’s, and while this was a fun project, I never thought much about it until I began chronicling my journey to learn how to improvise, adapt, and overcome in a catastrophic disaster situation.
Personally, I feel that this stove has some pretty severe limitations, its extremely hot, has little in the way of regulating heat, and its heating surface is small. However, as a way to begin to find new ways of using old things, up-cycling, or making a MacGyverism, this stove is a good way of exercising your mind.
That being said, here’s How to Make a Tin Can Stove
Materials:
- #10 can (empty of course)
- Multiple tuna cans (also empty)
- Cardboard (lots of strips as wide as the tuna can is tall, you’ll need a lot more strips than you think.)
- Paraffin Wax blocks
- Wick (I did not include this in my video, but it makes lighting the tuna cans a lot easier.)
Tools:
- Tin Snips
- Can opener
- Double boiler
- Matches
- Razor or study scissors for culling cardboard
- Gloves and other appropriate safety equipment
Procedure for stove:
- Using your can opener, punch air holes around closed end of can. (a tip from MM in Jackson – don’t punch any air holes in the side you will have toward you, so that smoke doesn’t blow toward you)
- Using tin snips cut a rectangle opening at open end of can, large enough to allow a burning tuna can to be pushed into, and pulled out of the stove.
Optional: use a metal coat hanger to fashion a damper on the stove opening using the scrap metal from cutting your opening
Procedure for tuna can burner:
- Cut cardboard long cardboard strips as wide as your tuna can in tall.
- Tightly roll the strips into a small spiral.
- A piece of cotton wick inserted into the center of the cardboard helps in lighting the burner later.
- If you need to add more strips, overlap the end of the strip coming off the spiral with a new piece of cardboard so that it stays together on the roll.
- Insert the spiral into the tuna can. This works best if the spiral is slightly larger than the can so that you must force it to fit. The more corrugated cardboard you can force into the can, the less wax you will need, and the fire will burn longer and hotter.
- If needed, you can force additional cardboard strips between the can and the spiral of cardboard. This is not easy, but it makes everything work better later.
- Once you have made as many burners as your hands can stand (I can make about 6 before my arthritis makes me stop), melt the wax using a double boiler.
- You should never heat wax over a direct source of heat, as it may flame up. If you do not have a double boiler, use a large pot of water, with a smaller pot nested inside. The wax is placed in the small pot and is melted by the regulated heat of the water instead of the heat from the stove eye. This is much safer.
- Once the wax is melted, line the tuna cans up side by side and carefully fill them with wax. It takes a surprising amount of wax to fill the cans, especially if you did not fully pack the cans with cardboard.
- Let wax cool.
Procedure for using stove:
- Only use this stove outdoors, it is burns hot and with a lot of smoke.
- Place the stove on site that will not burn or be damaged by high heat.
- Light the tuna can burner and as soon as it flames place it inside the stove.
- It will only take a few seconds for the closed end of the can to reach cooking temperature, so don’t touch it once the burner is inside (I learned this the hard way).
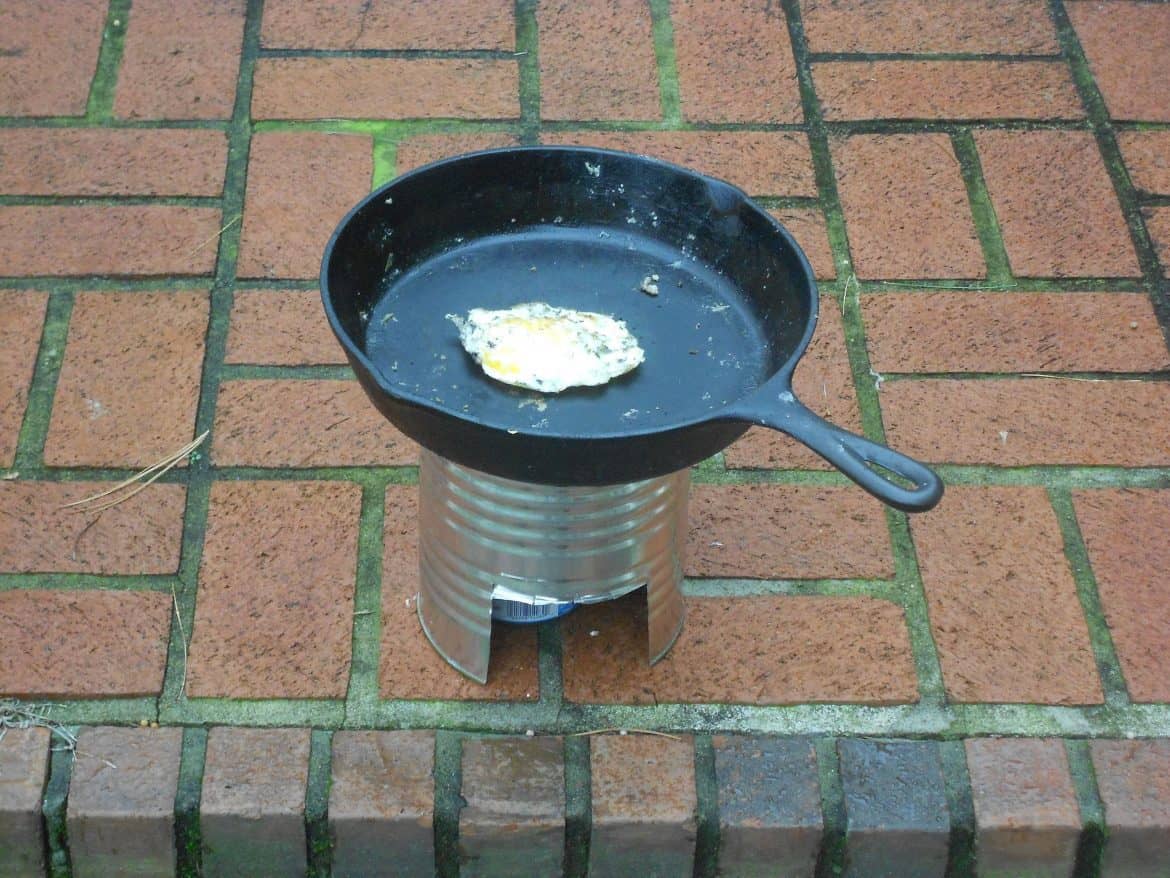
- Using a skillet is best, but you can cook things like hamburgers directly on the stove. It is too hot to cook things like eggs.
- Once cooking is complete, you can remove the stove and extinguish the burner.
- I flip the burner upside down and smother the flame so I can reuse the can, but you could smother it with dirt. Don’t douse it with water, or the hot wax may explode with some force and spray you with hot wax.