
In this video I show how to install an SD card in a ESI HN03 Bullet Camera. It is a poor design in which you must take a camera apart and add a mini SD card to make it record.
You would think that a security camera would come ready to work. I had to learn how to add the SD Card so I could finish my review of the ESI Bullet Camera
At least it was not hard.
All you need is a small Philips screwdriver, a flat tip screwdriver, and a mini SD card.
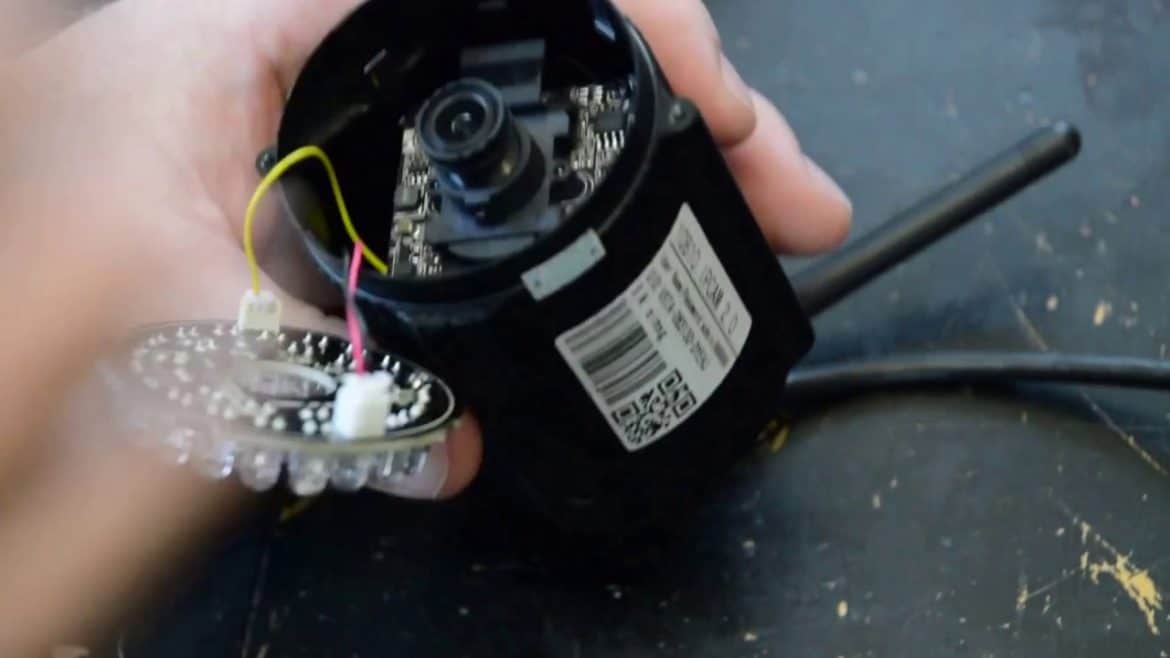
First remove the two screws holding the clear lens cover.
Next, remove the lens cover and pry out the rubber ring surrounding the lens.
Then, pry out the IR illumination ring and then take out the four small screws holding the camera board in place.
Additionally, to get to the circuit card holding the SD mount, you need to remove a small sponge that wedges the card in place.
Next pull out the circuit card and install the SD card in the metal mount.
In the video I had a lot of lag, but when I reduced the camera image from Maximum quality to high quality it greatly improved speed. We set it to medium quality at the land and got a good enough picture to identify intruders and read license plates and it was responsive enough to catch them without any camera lag time.
Now that the SD card is installed I set the camera to record 24/7 and now I can record locally to the computer as well a any phones setup for the camera. Additionally you can take still images.
Since it records to the computer and the phone I don’t understand why the camera needed an SD card, but it did to activate the recording functions.